***EDIT***
With the release of the TechGasp WordPress Framework all plugins version 4.0 and upwards have built-in Advanced Updater (use the built-in Advanced Updater to update your plugins). Do not follow this tutorial except if you have a really old plugin version.
If you are looking for Advanced Updater instructions, read your plugin Documentation & Instructions page.
***END EDIT***
All TechGasp plugins are very easy to install and upgrade. The same process applies to upgrading Lite Version plugins to Advanced Version Plugins and upgrading old Advanced Version plugins to new Advanced Version releases.
How to Install or Update old TechGasp Plugins
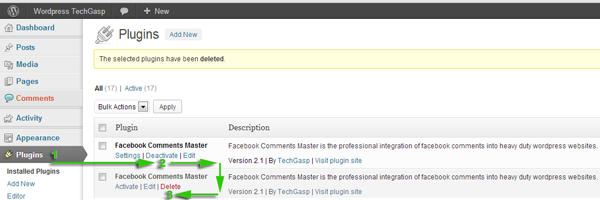
The first step is to deactivate and then delete your lite version plugin or old advanced version plugin. This is done in the wordpress administrator plugin page. Although you are removing the plugin, leave the widget ON and in place, do not remove the widget in the administrator widget page, the reason is simple, upon upgrading both the widget template position and your personalized widget settings will be kept.

The second step is to download the advanced plugin. Upon purchase an email was sent to your inbox with the advanced plugin download link. Click and download to your desktop.
The third and final step is to install the downloaded advanced plugin. From your wordpress administrator plugin page click add new.

afterwards, upon page reload, click Upload or via this page. Choose the file you just downloaded to your desktop.

Finished… If the widget was left in place in the widget page, all settings and widget position got saved and you do not need to reconfigure the widget or add it to your template.